If you plan to spend more than a day outdoors, the ability to read a map with confidence and accuracy will be invaluable. However, there is much more to do than meets the eye.
In this guide, we will review the fundamental tools and methods of basic map reading. If you can master these skills, you should be able to read any earth map well enough to get where you need to go.
With practice, you can learn to read a map without any tools, but you'll still sacrifice some accuracy doing so. When first learning, or when accuracy is paramount, you will need a few basics.
-
Topographic map : Of course, you will need a map to read. A topographic map is a specific type of map designed to aid land navigation across the country
-
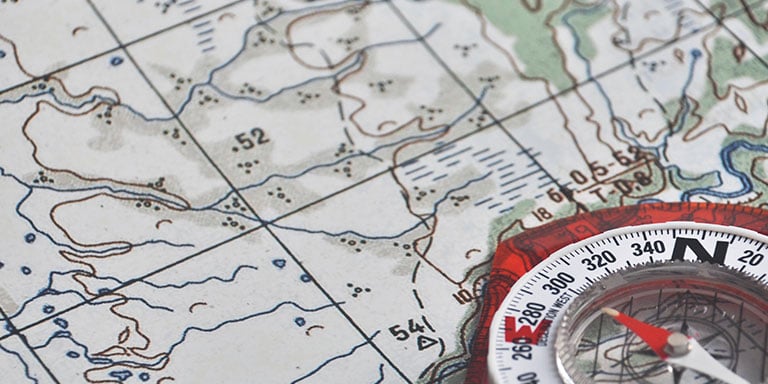
Compass: You can get a basic one with graduations (they're important) for under $20.
-
Waterproof card case and plastic cover sheets: If you are going to practice map reading outdoors, make sure the map is protected from rain and moisture. Whether you're indoors or outdoors, you'll also need acrylic overlay sheets so you don't have to draw on the map itself.
-
Pencil or marker: Depending on what you are drawing on, you will need pencils or erasable markers.
-
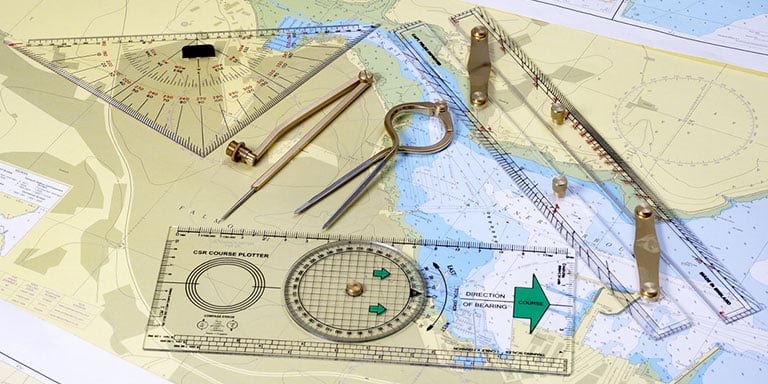
Compass (drawing tool), ruler and protractor: they are basic tools for calculating angles, circles and distance. You can buy a pack containing all three for a few dollars. You'll use them more for actual land navigation than just reading a map, but you might find them useful for checking your understanding as you practice.
-
Small notebook : Map calculations can get slightly complicated, so you'll need a place to do simple calculations. It is also useful to be able to review your previous calculations in case you make a mistake.
Parts of a map
Some highly specialized cards have features you won't see on most others, but all cards have a few basic things in common.
-
There legend is the key that tells you what everything else on the map means.
-
Look for a ladder to see the actual distance represented by certain units of measure on the map.
-
There compass is a diagram that shows the direction in which north is.
-
Charts designed for land navigation should have issue dates , which is useful for determining magnetic declination (more on that later). Better, more expensive maps may have actual declination lines.
Map reading skills
Once you've gathered your basic supplies, study your map and familiarize yourself with its various elements.
Orientation
Start by finding the compass rose on the map. Lay your compass on it, slightly offset so you can see north on both. Rotate the map and compass until they are aligned and pointing precisely to north. Be sure to keep the compass at least a foot away from metal and electronics, both of which can interfere with its heading. Particularly strong magnets can interfere at several meters distance. Finally, you might also want to face north; many people find this makes reading maps easier.
Take great care to orient your compass with maximum precision - an offset of one degree translates to an offset of hundreds of meters over a distance of ten miles.
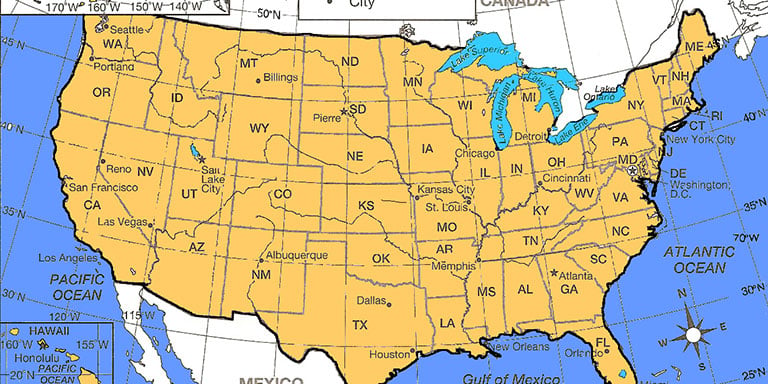
Magnetic declination
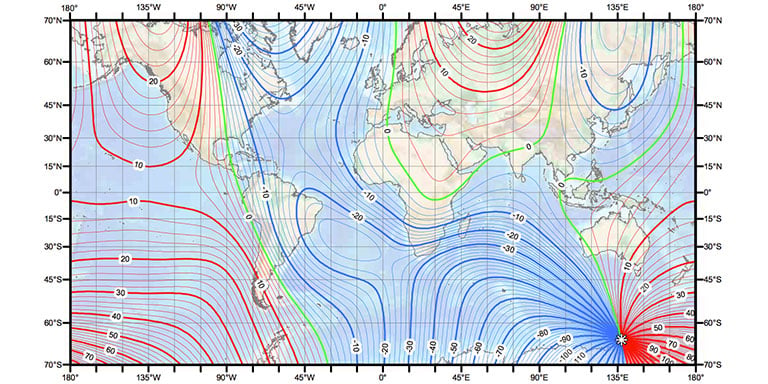
Also called magnetic variation, magnetic declination describes the difference between magnetic north and true north, which varies by location. It may even change over time, although annual changes are insignificant - it takes decades for these small changes to begin to have significant effects on chart reading.
To read a map accurately, you need to know true north, which is probably a few degrees east or west of what your compass points to. You can calculate true north if you know the declination value for your current location. The most accurate way to find it is with an online calculator, but we're going old-fashioned here and assuming you're out in the wild with no internet access. Your next best bet is to use a paper declination map. It might be a separate map of the country, but high quality local maps also have declination lines.
Find your current location on the map, then locate the declination line closest to it. It will have a positive or negative value; these values can be shown on the line itself or the lines can be color coded. Round to the nearest whole degree, then adjust your compass by that number of degrees, remembering that declination is positive east of true north and negative west of true north.
If your map was printed within the last twenty years, you probably don't need to make adjustments for time-related changes in declination. In most places on earth, the lines of declination move of about three degrees every hundred years, so if your map is over twenty years old, you can use the following formula to get a rough estimate of how many more degrees you need to adjust your compass:
(current year - year of card printing) x 3
100
You should now have an orientation that is accurate enough to use for navigation.
Map colors
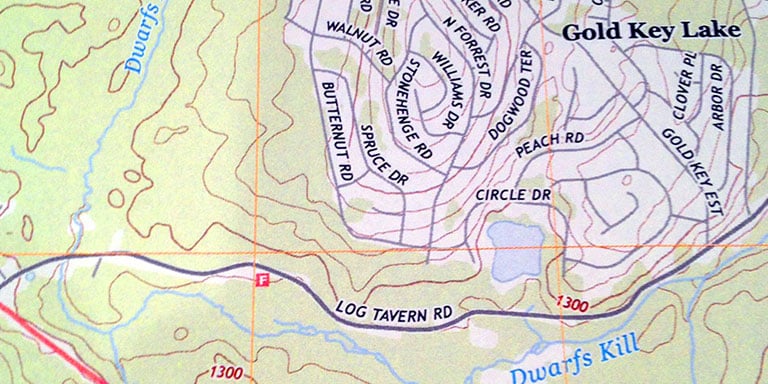
Maps use colors to indicate various terrain features, but there is no universal color code, so you will need to refer to the map legend or use contextual clues to understand what its colors mean.
Most often, land features above sea level will be depicted in shades of green, yellow, or brown. Those below sea level are often gray or red, and roads are usually black, red or purple. Blue represents water almost without exception, with darker shades indicating deeper water.
It is important to note that colors do not necessarily represent terrain types or vegetation. For example, on many maps, much of the Mojave Desert is green, but that doesn't mean it's covered in foliage (conversely, if a desert is brown or yellow in color, it's not probably not because it's sandy).
Grid lines
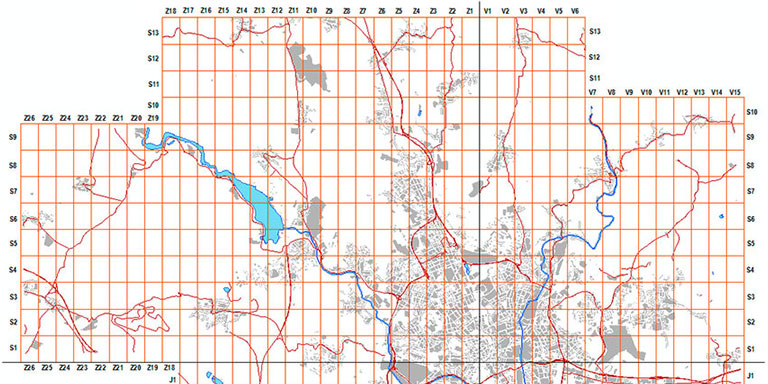
On a map, grid lines are used to easily find and mark specific locations. Rows and columns will be marked with letters and/or numbers, used to reference the square formed at their intersection (eg "A3" or "GK"). When writing grid coordinates, always write the east-west or horizontal coordinate first. If you use a map book, it will usually contain an index of towns, roads, and other important landmarks, along with page numbers and grid coordinates to easily find them on the relevant map.
Contour lines
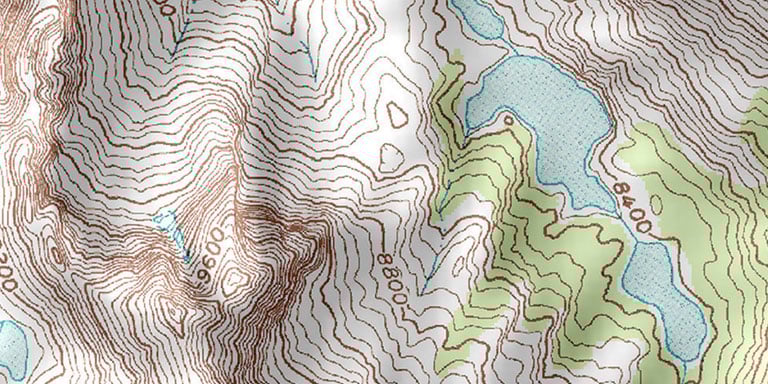
Contour lines indicate elevation changes and are a little harder to read. They are easily identified as meandering lines with numbers next to them, and they are almost always arranged in shapes approximating concentric circles. Each line or circle represents a consistent interval of elevation change, and you will need to refer to the legend to see what that interval is. Many lines close together mean you are looking at a steep hill or mountain, while fewer lines spaced apart represent a gentler slope. The numbers beside or bisecting each line indicate the height above sea level at that point on the map.
On most maps, solid contour lines indicate elevation increases, and lines with dots or tick marks represent elevation decreases.
Land characteristics
There are many types of terrain features, but if you know these eight elements, you will be able to read most maps comfortably.
-
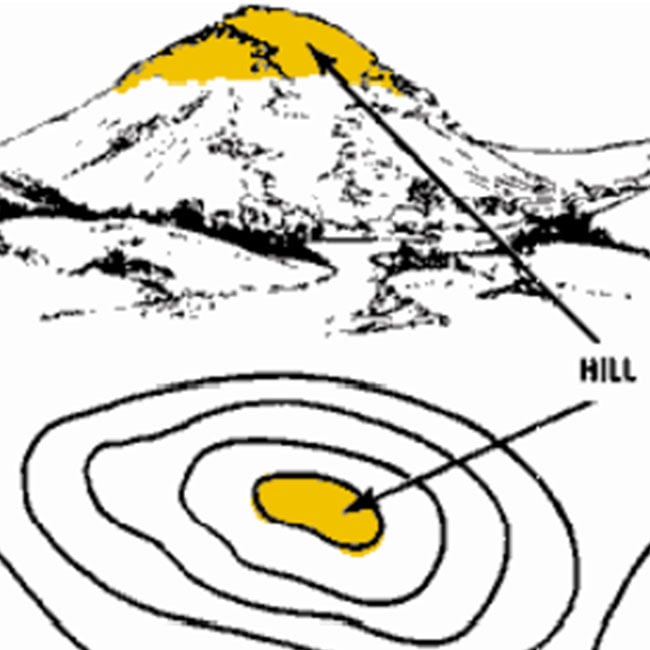
Hill
A hill is a point or area of elevated ground from which the ground slopes down in all directions.
-
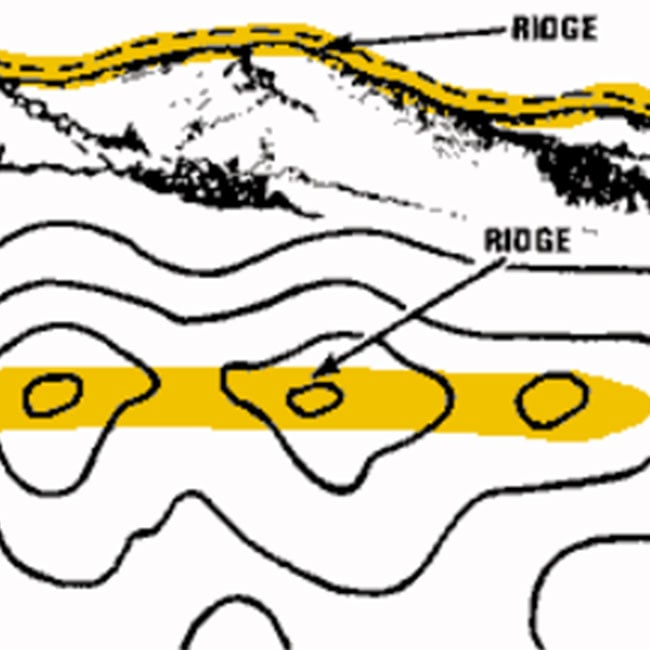
The crests
The ridges are like a single, long hill with a contiguous summit. All points along the top of the ridge are higher than the ground on either side.
-
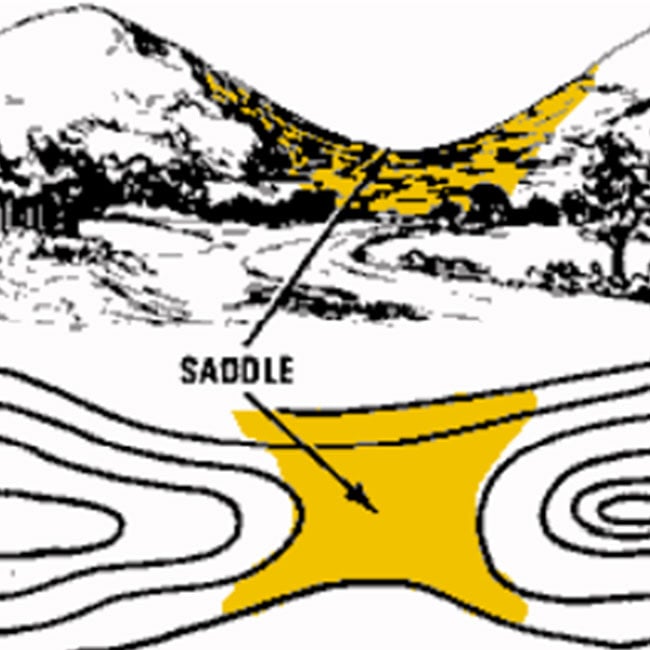
Saddle
A saddle is a dip or low point along the crest of a ridge.
-
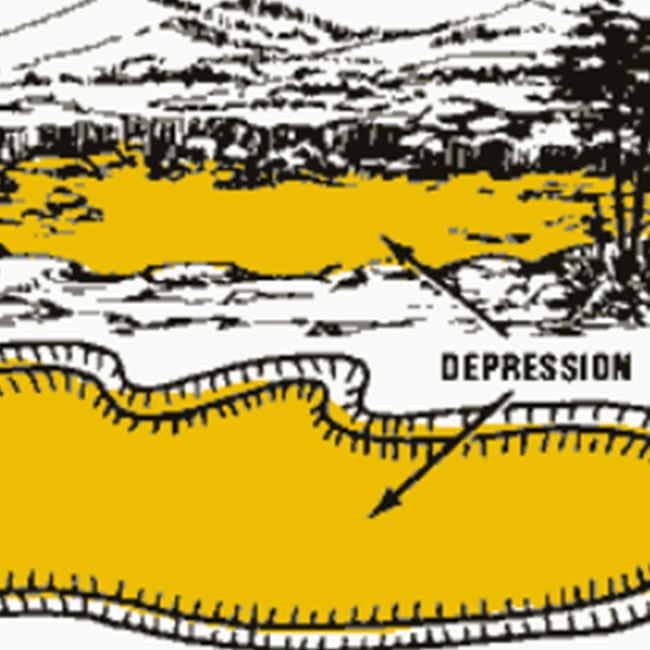
Depressions
Depressions are holes or low points surrounded by higher ground on all sides.
-
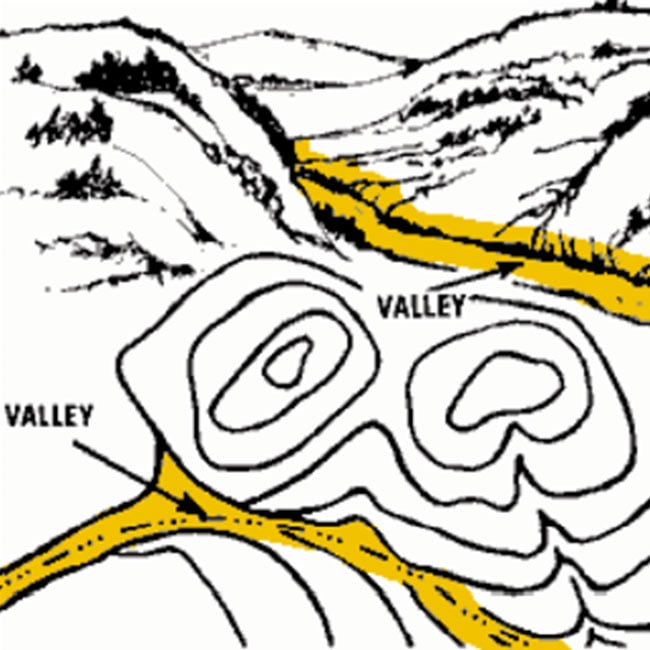
Valleys
Valleys are similar to depressions in that they are surrounded by higher ground, but they are much longer and more like riverbeds (some contain streams or rivers). The valley bottoms are relatively flat.
-
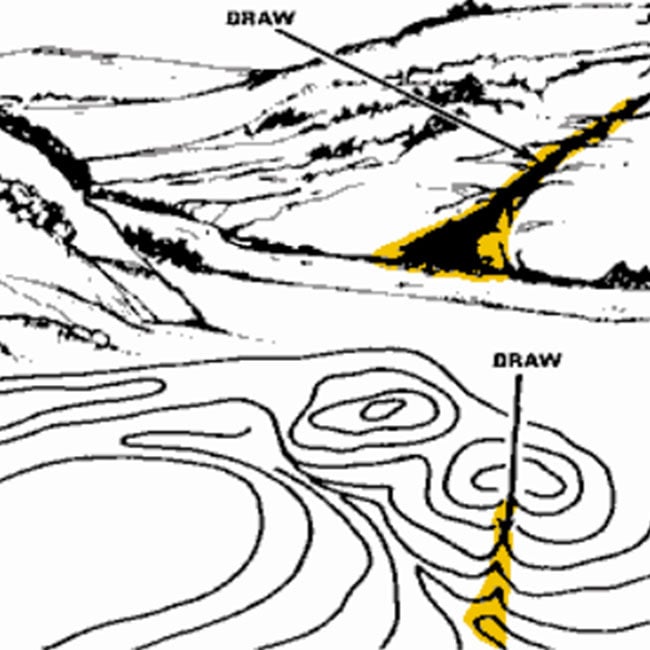
Bed
A bed is a downward sloping channel or river bed with an irregular bottom. It is usually created by flash floods and is narrowest near the point of origin.
-
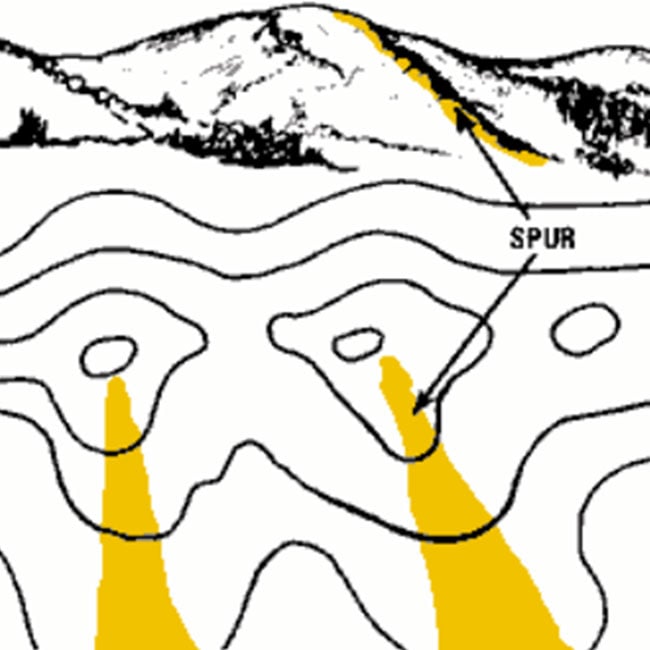
Spurs
Spurs are short, angled sections of higher ground found on the sides of buttresses. They are usually created by parallel streams that erode the terrain on either side.
-
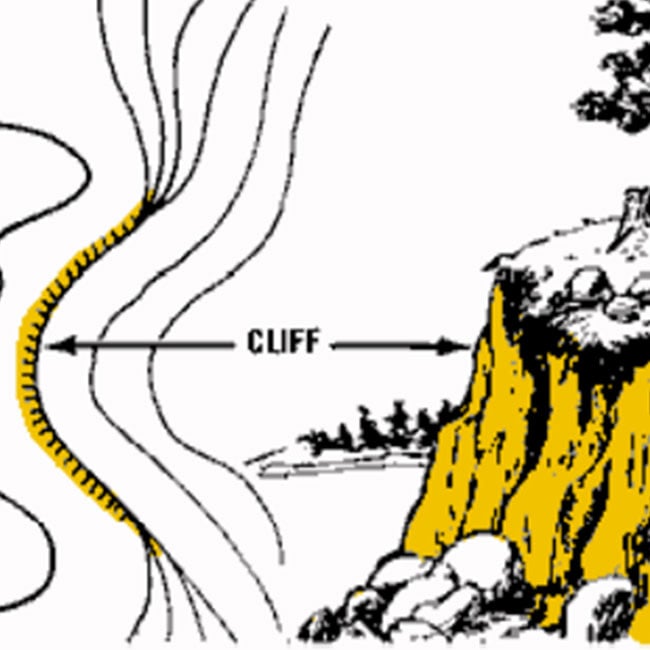
Cliff
A cliff is, of course, a vertical or nearly vertical slope.
latitude and longitude
These lines are separate from the grid lines. Highly detailed maps of very small areas do not have them, but virtually all others do.
Latitude lines run east to west and longitude lines run north to south. To help you remember which is which, note that on a map, the horizontal lines of LAtitude look like a SCALE. The equator is at zero degrees and the north and south poles are both at 90 degrees. Coordinates north of the equator are given in degrees north and those south of the equator are given in degrees south.
Lines of longitude follow the same basic principle, with the prime meridian representing zero degrees. However, lines of longitude go 180 degrees in each direction, rather than 90. Coordinates east of the prime meridian are given in degrees east and those west are given in degrees west.
As you'd expect, degrees of latitude and longitude alone aren't precise enough to locate a specific place on the planet - a single latitude/longitude grid square can encompass an area as large as 4,900 square miles. For this reason, degrees of latitude and longitude are divided into sixty minutes, which are themselves divided into sixty seconds. You may find it useful to memorize these commonly used reference numbers:
- 1 degree of latitude (written 1°) = 70 miles
- 1 minute of latitude (written 1') = 1.2 miles
- 1 second of latitude (written as 1") = 0.02 miles or 105.6 feet
Note that these numbers only apply to latitude. This is because lines of latitude are evenly spaced at any point on a map of the world. Lines of longitude, however, are not as easy to convert to physical distance. At the equator, 1 degree of longitude is also 70 miles, but as you move north or south, 1 degree of longitude is less and less distance because the lines of longitude converge at the poles. Your map can display accurate longitude measurements for the area it represents.
Once you figure out how to read and write coordinates this way, identifying specific locations on a map is pretty straightforward. The center of Chicago, for example, is located at 41°51'0"N 87°39'0"W, read as "41 degrees, 51 minutes, 0 seconds north; 87 degrees, 39 minutes, 0 seconds west.
Compass degrees
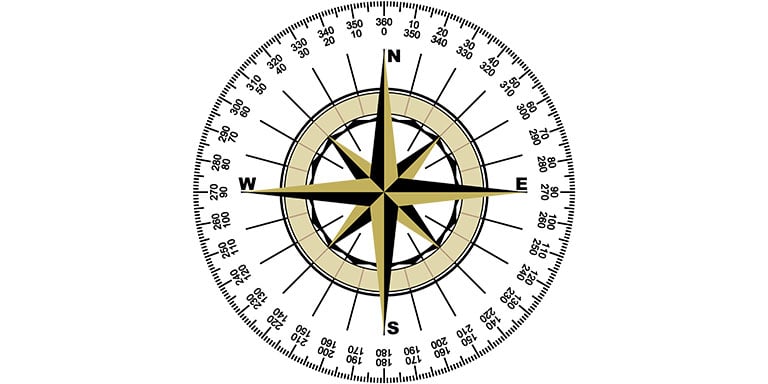
Compasses also use degrees, but these are not the same degrees you refer to when calculating latitude and longitude.
Compass degrees are used to identify a precise direction of travel, while latitude and longitude indicate a specific location on a map.
Inexpensive compasses do not have degree marks; they are more toys than actual navigational aids, so be sure to take a compass that has appropriate graduations. There will be 360 degrees marked around the circumference of the compass, usually in increments of five.
S ome compasses have degree graduations only from 0 to 90 (ie north to east). In such cases, you will need to add 90, 180, or 270 degrees as needed to indicate southeast, southwest, or northwest headings, respectively.
In the context of map reading as opposed to land navigation, you will most often use compass degrees to indicate the position of one point of interest relative to another.
It can get awkward and inaccurate to say "point B is about 42 miles south-southwest of point A", so instead you can just say "point B is 186 degrees, 39 miles from dot A".
This means that if you draw a perfectly straight line between these two points, it will be exactly 39 miles, and its angle will be exactly 186 degrees, measured from north (on the map - not necessarily true north).
Maps are rich and complex things - hence cartography is its own craft.
Luckily, you don't have to be a cartographer to read a map proficiently, and you should be able to do so once you've spent some time practicing the basic skills we've outlined here.